Introduction
The Scribe Patient Charts Module is an EMR “lite”, designed to allow the Healthcare Practitioner the freedom and flexibility to manage Medical Records Information without spending unnecessary extra hours inputting Patient Data for each new visit.
The Healthcare Practitioner or Practice decides which information needs to be carried forward from one Patient visit to the next, making only those edits needed at the time of the visit, freeing up the Practitioner to spend more time with the Patient, relieving Administrative staff from repetitious data entry and potentially eliminating the need for paper records altogether.
The following “Recommended Workflow” document has been created as a Reference Guide to assist you in becoming more comfortable with the Patient Charts Module.
Section 1:
Open Patient Charts via the Schedule tab
Schedule tab Workflow (navigate to selected patient visit)
Edit and Approve your initial record
Summary Page Workflow (open a dictated and transcribed record)
Edit page Workflow (tips on Editing and Approving a transcribed record)
Time-Saving Macros (use of Macros in Scribe to greatly reduce typing)
Viewing the Approved record via the “Type” hyperlink
Section 2:
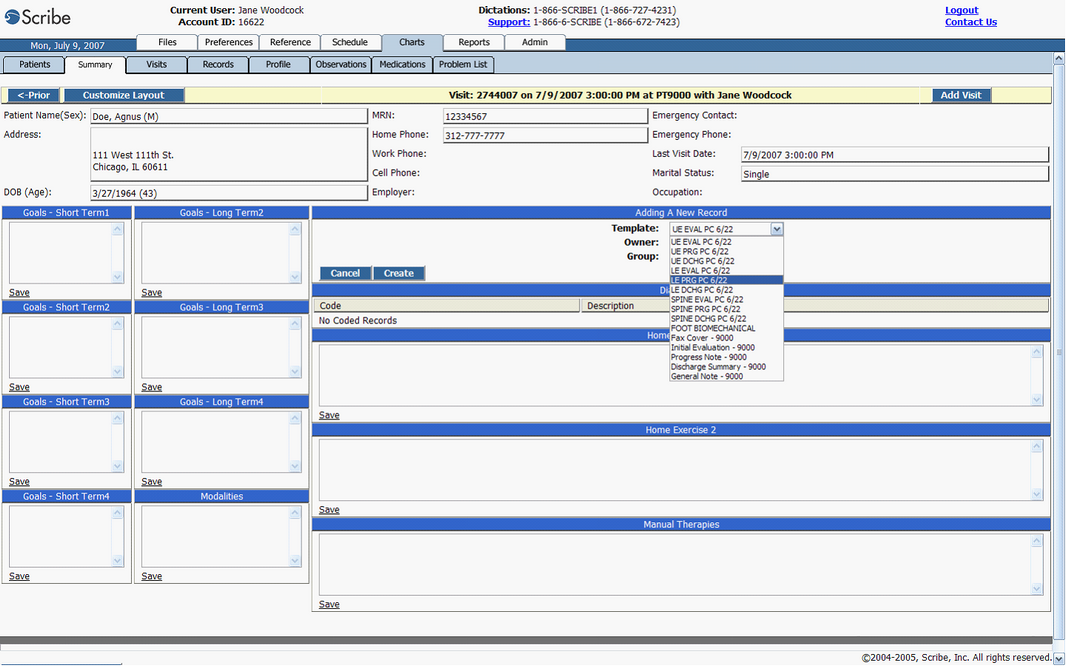
Creating a new record in Patient Charts
Create a new record (Summary Page)
Editing and Approving the new record
| • | Records completed and Approved in one editing session (to be done in Patient Charts) |
| • | Records requiring multiple edits before Approval (to be done from the Inbox) |
Recommended Workflow: Creating a new document in Patient Charts
Note: The initial record for a new patient can be created:
1) via dictation and transcription or….
2) via MD creation directly in the Patient Charts
The following workflow process describes the first process using dictation and transcription as the beginning of the process.
Section 1:
Open Patient Charts via the Schedule tab
Login to Scribe. You will be taken to the “My Files” page. At the top of the browser window, you will see a series of tabs. Click on the Schedule tab to find the desired Patient visit. Be sure that your search parameters are set correctly in the left hand side of your screen.
Schedule tab
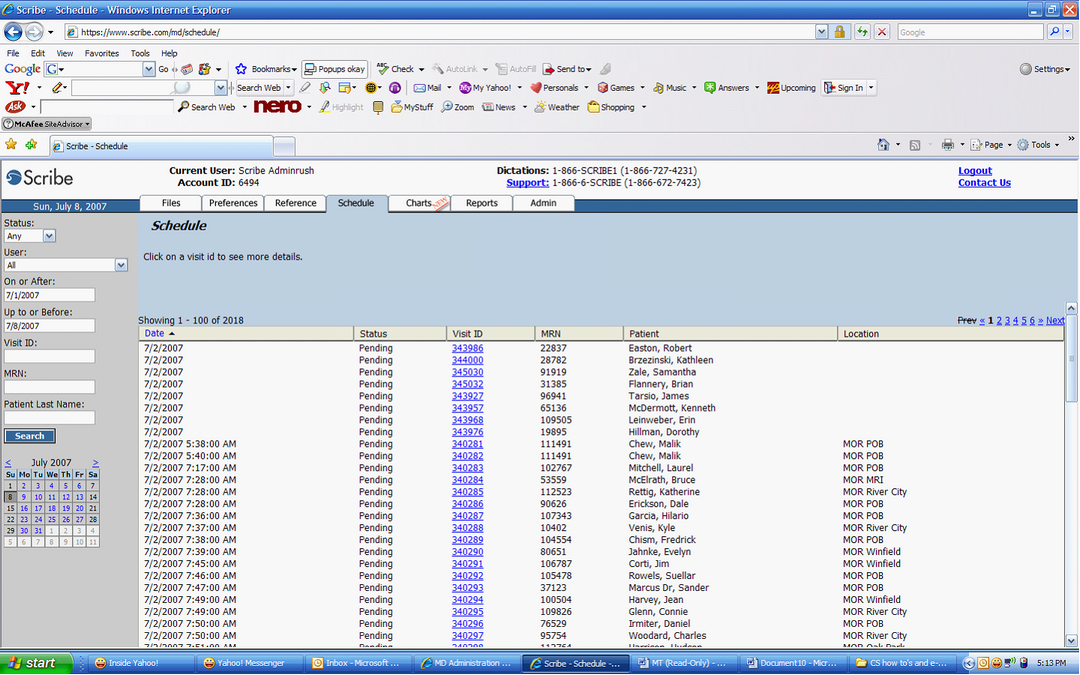
The Schedule will open the selected Patient Visit.
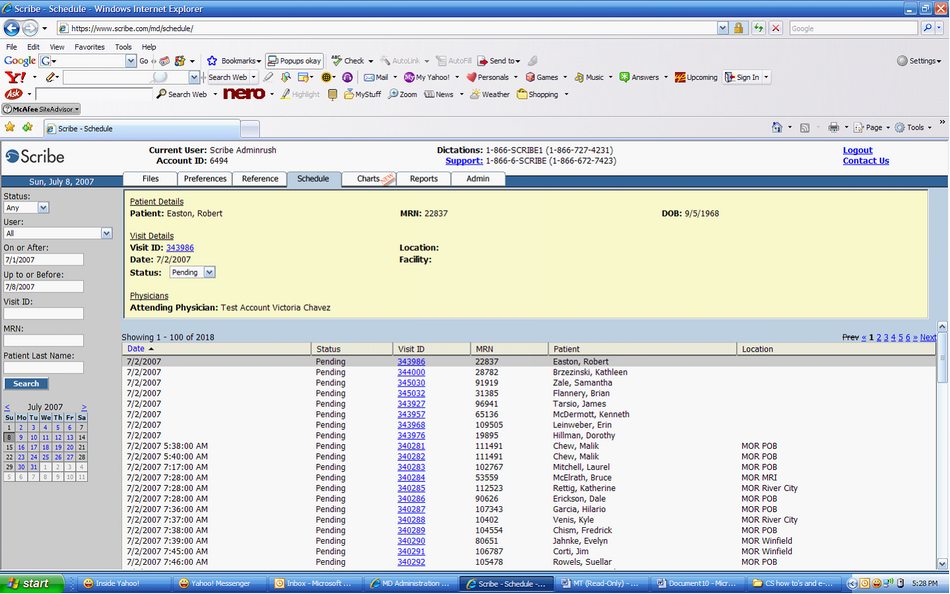
After clicking on the “Visit ID” hyperlink, you will automatically be directed to the “Summary page” for the Patient Visit you selected.
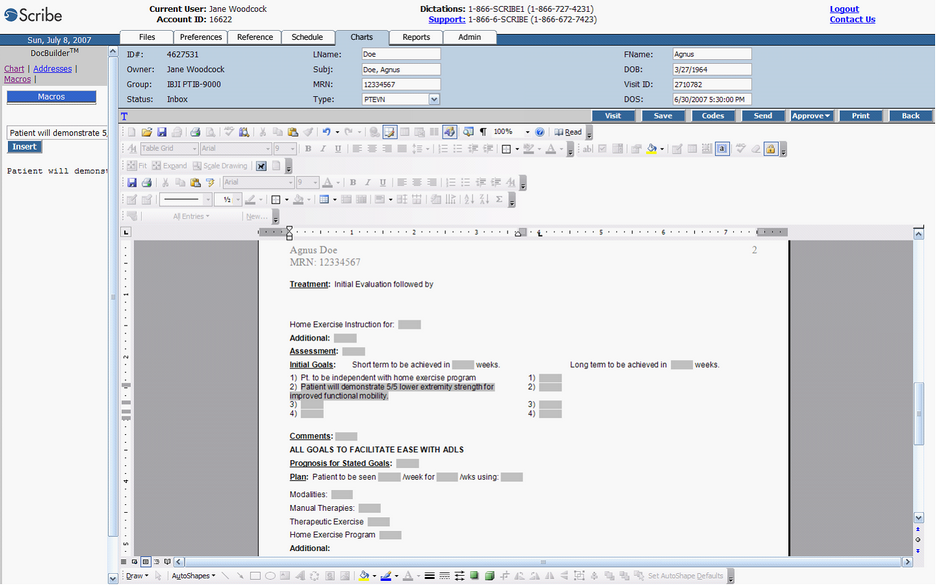
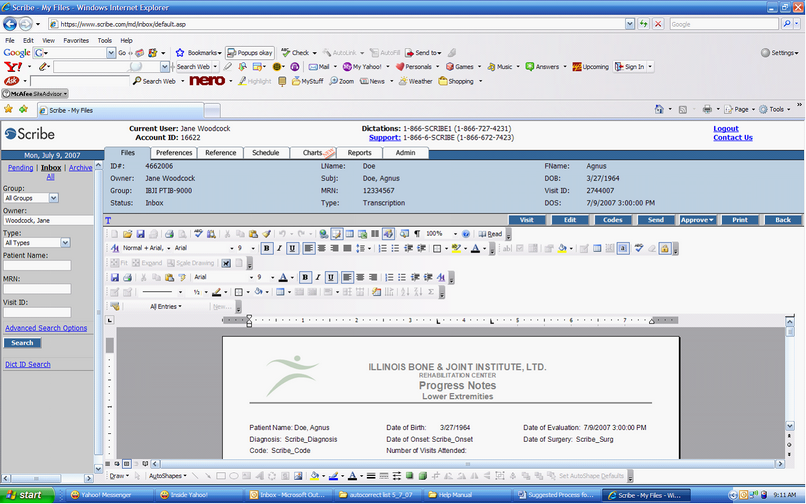
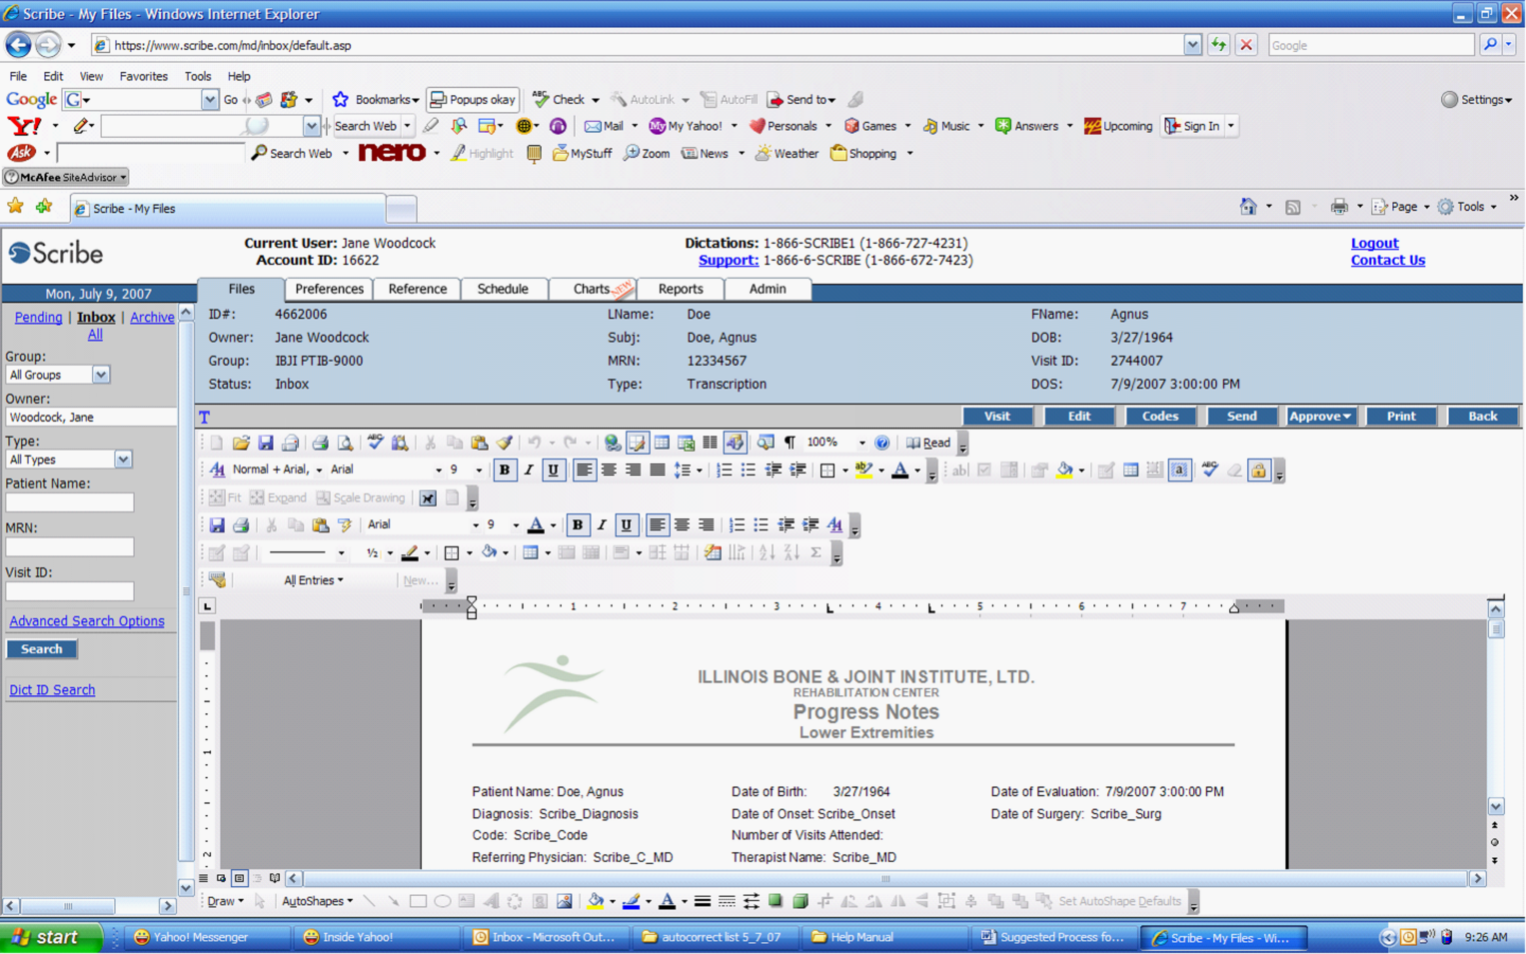
Edit and Approve your initial record
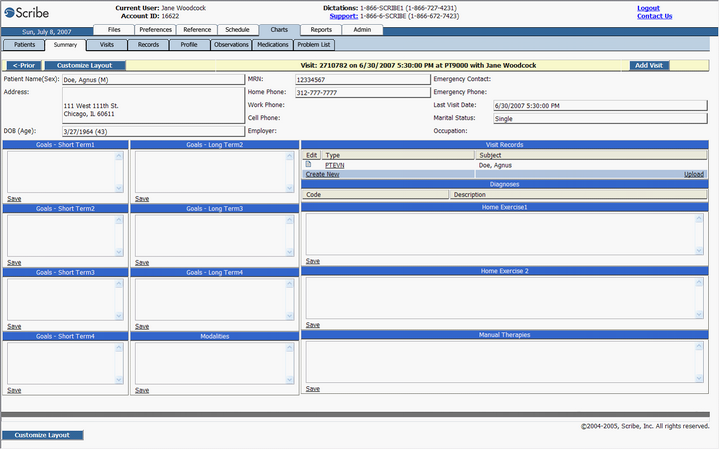
If an initial record was dictated for the Patient, this record can be viewed in the “Visit Records” section of the Summary page. If no dictation was made, you may also use the “Create new” record process described in Section 2 of this guide.
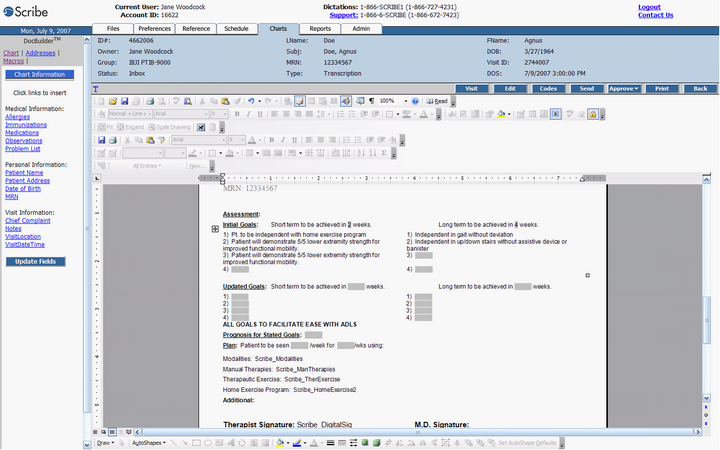
Edit page
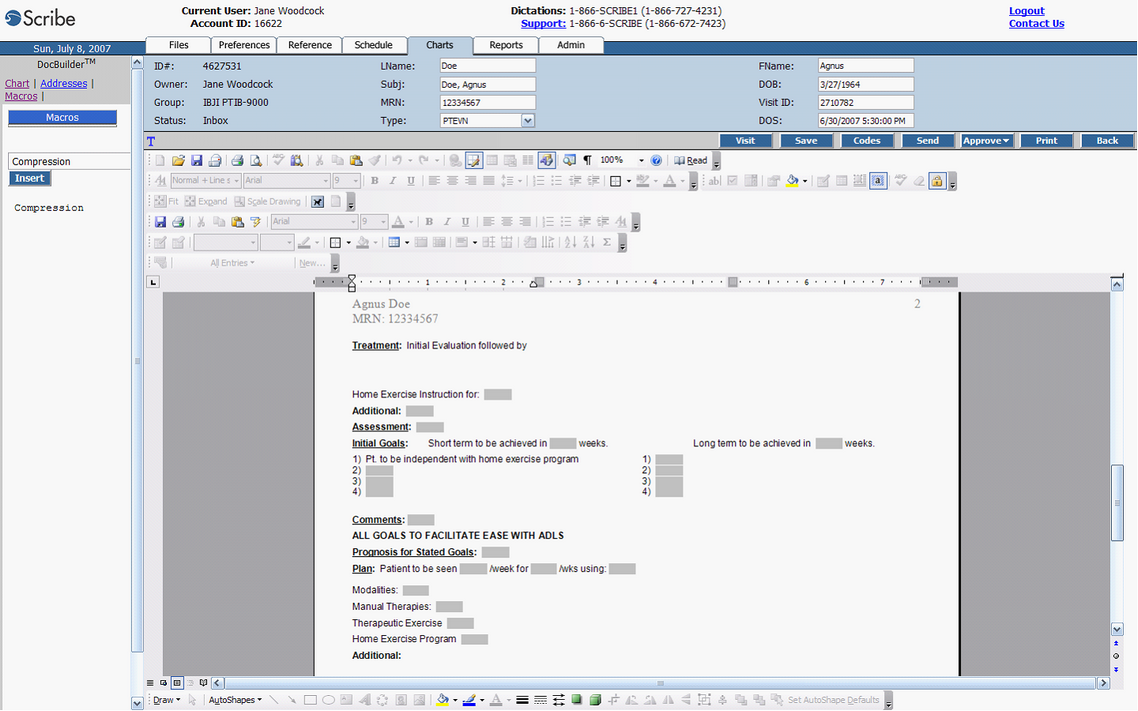
The Record is now open for editing.
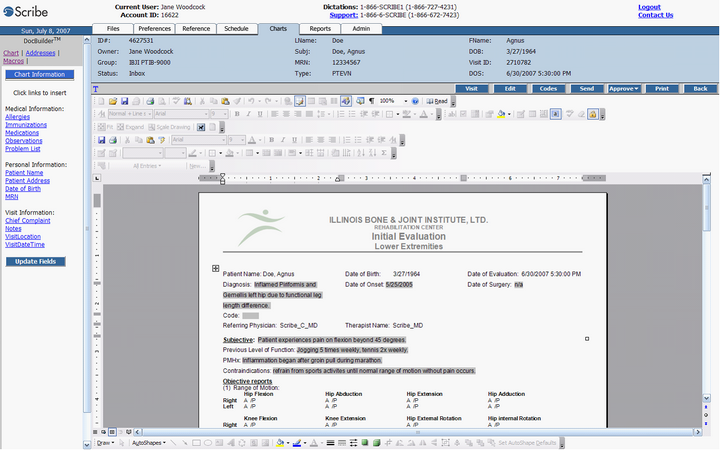

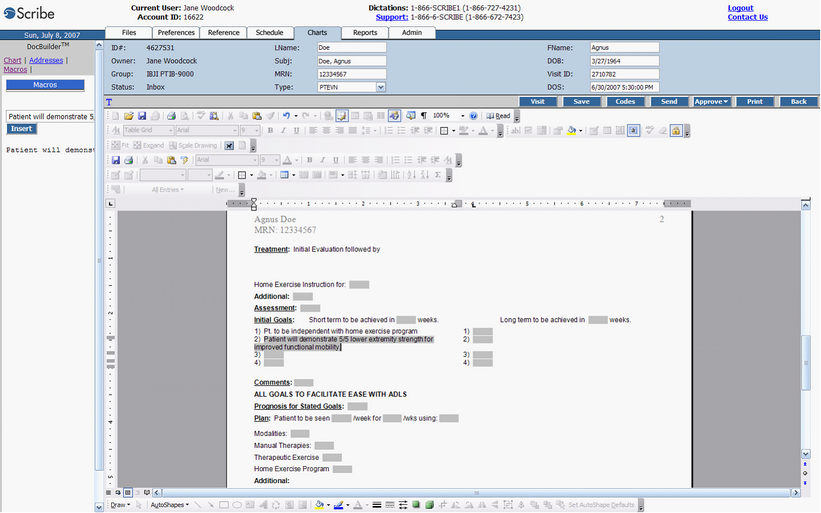
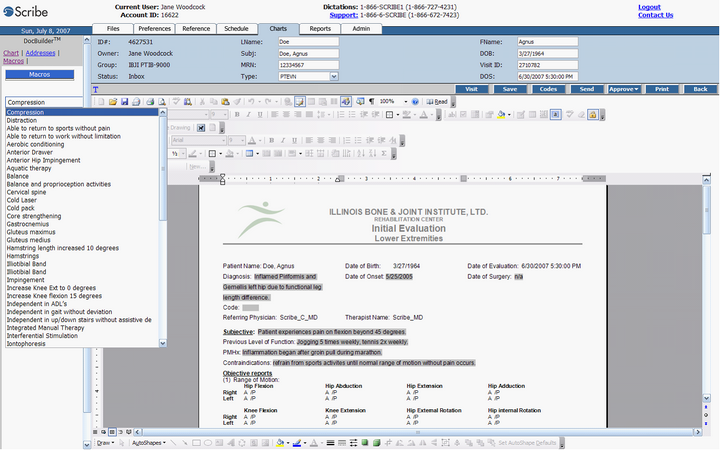
You may now edit in the body of the document by free typing or by selecting text for insertion anywhere in a document using the “Macros” hyperlink.
Using Macros
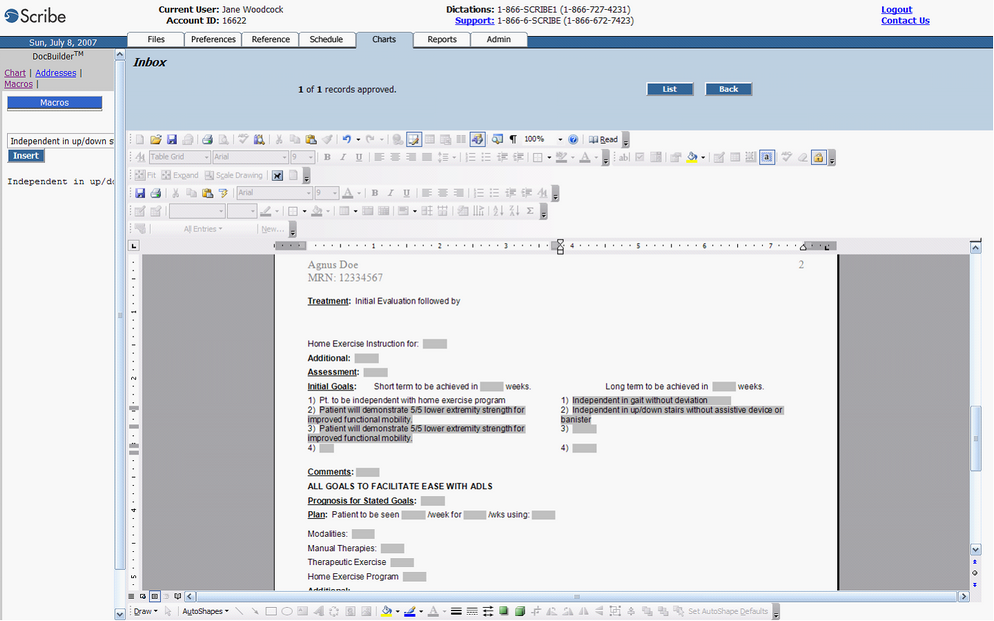
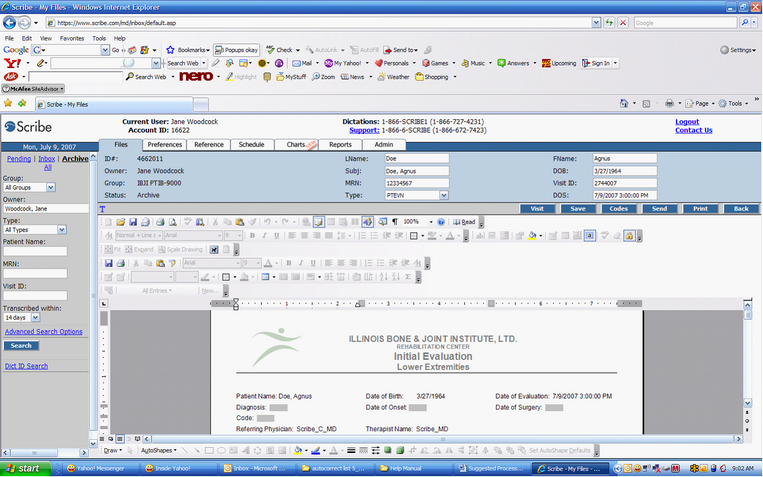
15) Once you have “Approved” your record, additional edits can be made by typing directly in the boxes in the Summary Page and clicking “Save” after each edit (Do not edit the template form fields in the record directly, as these will not carry forward to the next visit or record).
Edits made within the Summary page boxes after Approval will not apply to the Archived record, but will carry forward to:
| • | Any additional record not yet “Approved” in the current visit |
| • | The Summary Page for the next Patient visit, and all records that will be created for that visit |
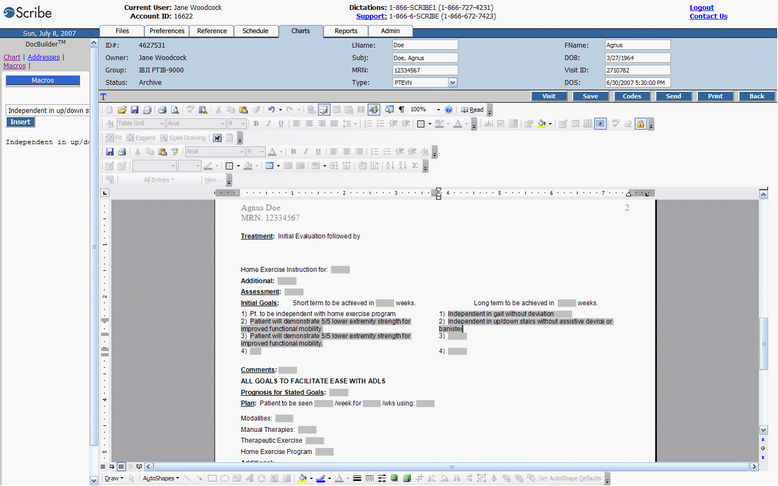
Viewing the Approved record via the “Type” hyperlink
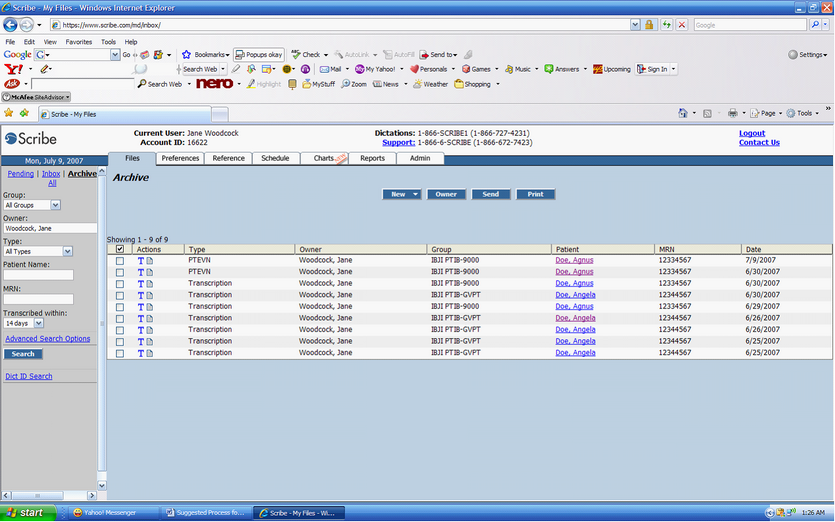
View the Approved record via the “Type” hyperlink in the “Visit Records” section of the Patient Visit (which serves as a link to your “My Files” Archive), or by visiting the “Archive” section of your “My Files page, which opens when you first login to Scribe.


Section 2:
Creating a New Record in Patient Charts
Login to Scribe, and open the current Patient Visit via the schedule tab (See Section 1 – “Open Patient Charts via the Schedule tab”, steps 1 – 5, pp 2 - 3).
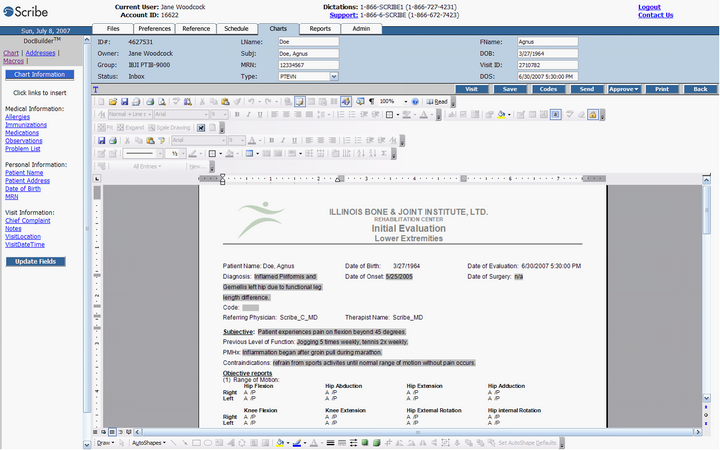
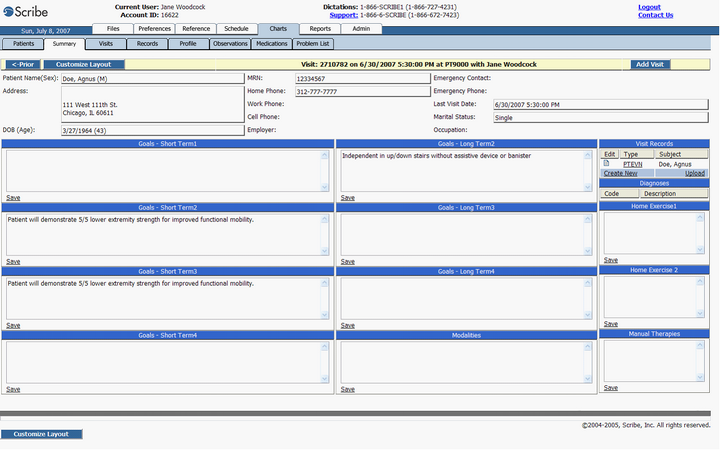
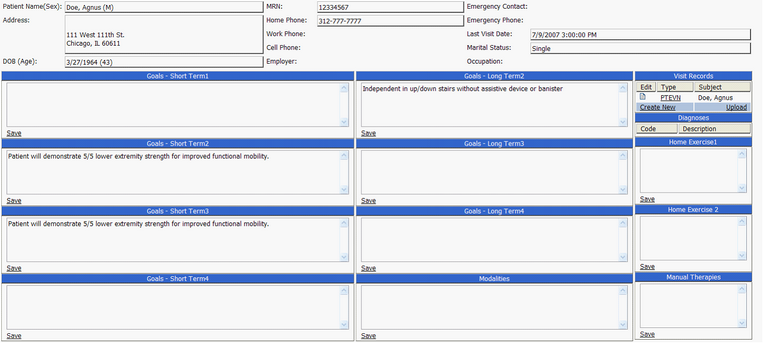
Summary Page
![]()
Editing your record
Workflow for Records requiring multiple edits before Approval
6) When you are ready to make further edits to your document, login to Scribe, but do not go to the Schedule tab. Instead, stay in your “My Files” page in the “Inbox” section, which will open automatically upon login.
7) Edit the document when it opens in the Inbox, as you would in Patient Charts.
8) When you have finished editing the record in your “My Files” Inbox, click “Save” to activate the “Approve” button for use.
If you must exit the record before completing the edits and Approving the record, NOTE that further edits and “Approve” must be done from the Inbox as well.
Note that changes made in the Inbox before Approval WILL NOT appear in the fields on the Summary page in Patient charts, but WILL carry forward to the next visit, as long as the document has been Approved from the Inbox, prior to the next Patient Visit.
The record can be viewed either in the “My Files Archive” section of Scribe, or by clicking on the “Type” hyperlink in the Patient Charts “Visit Records” section.